Showing posts with label Decor. Show all posts

Sunday, June 28, 2015

Patriotic Decor

 It's officially summer! Hooray! (Those of us living in New England feared it would never come.)

My favorite part of summer is celebrating the Fourth of July. Parades, picnics, and fireworks are all apart of the fun, but, I fear the reason for the holiday is set aside while the party is taking place.

The actual name of the holiday is Independence day. It commemorates the adoption of the signing of the Declaration of Independence, on July 4, 1776. 

So, as we celebrate, let us remember to be grateful for the freedoms this beautiful country provides. Let us remember to stand united and be proud to be American!

Now, let's talk about ways to decorate for the occasion.

I had a hard time sticking with one "theme" this year. There were several different aspects that I felt passionate about. The historical, cultural/personal, and the trendy aspects were all on my mind. So, I made all three work in our home. We have three locations in the living room in which to decorate. I chose to make each a different theme. 

1. The Historical Aspect


In this set up, I draped the flag over a floating shelf. It is being held up by a tack at the upper grommet. You could put a tack in the lower grommet also, but it held just fine and I like the hanging look. I like how the bottom of the flag hangs down, now I just hope and pray that my kids don't yank on it while sitting on the couch!
I found the painted ceramic piece at Goodwill for $3. George Washington is in the middle with two others on the sides. On the bottom is painted 1776. I was drawn to the piece. I admit that something about it bothered me at first, but I grew to love it. I like how it added the historical reminder to my decor. The bicycle also came from Goodwill for $3. I like the uniqueness of it. 

2. The Cultural/Personal Aspect


I really wanted to incorporate baseball into my decor but wasn't sure how I was going to pull it off. While visiting my parents, I talked to my Nana about it. She told me about her Grandfather, the minor league baseball player. My mom dug out this photo and it all started coming together. The photo is dated June 6, 1915, which makes it 100 years old! I like how it adds an heirloom to the decor.  The story behind it makes it apply to the holiday also. My Great, Great, Grandfather, Robert Siberia Eaves was born while at sea, over the Atlantic Ocean on March 27, 1871. (Can you imagine giving birth on the ocean in wintertime?!) His parents desired the freedoms that the United states offered and moved from England to America. The name of the ship was "The Siberia", which explains his middle name. His nickname was "Si". I am so grateful for the sacrifices that my ancestors made, which made it possible for me to be born in this wonderful country! I am proud to hang his picture in my home!
When I think of baseball, I think peanuts, so naturally I had to incorporate them and the flags help tie the decor themes together.

3. The Trendy Aspect


This display is not my favorite and needs work. It is staying as-is for now though. My favorite piece is the Proud to be American set up. This is one of the first projects I shared on my blog. (view HERE)
I did change the "P" because the kids broke if off and I replaced it with a blue block and stamped a "P" in white paint. It's growing on me, and I think it adds more character. 

I love decorating for the Fourth, it is so much fun! I recently filmed a Fourth of July show for Holiday Fun with Hillary on Amherst Public Access TV. For the show, I blended all of these concepts together into a beautiful display. As soon as I receive those pictures, I will post them.

I hope you all have a great Independence Day, and enjoy the decorating process!

*Hills

Tuesday, February 10, 2015

Valentine's Day Decor

This post is last minute, and most people probably have decorations up already, but here are some ideas anyway.

I have a few different set-ups to share with you. I have the set-up for Holiday Fun with Hillary and also how I have decorated my home for Valentine's day.

1. Holiday Fun with Hillary set-up

You can watch the show by clicking HERE.

2. LOVE displayed on a shelf with accents


 For some reason I find that every picture I take of this set up is visually distracting. It is not in real life, however. I was just looking at it, I am thinking that I can trade the hurricane glass with gumballs for the letter "L". I might play with that and make an update.
Credit for the wicked cute printable goes to Desiree from The 36th Avenue <~ Click here to get  yours!

3. Window display


This window stays up almost all year. I love it, so I try to find ways to incorporate it into each Holiday. I used chalk markers and wrote on the glass. I am not a huge fan of how it turned out, but I have set a goal to not criticize myself so much, so I left it. There is also a mason jar sitting filled with M&Ms, a jar with washi tape arrows sitting on old books, and a block calendar. 

4. Melted Crayon Art, Healthy Heart Attack, and Lollipop Tree


The "Healthy Heart Attack" is the the heart bouquet on bamboo skewers. This is something Patrice has done in past years. Cut out paper hearts and tape them onto skewers. You can write messages to make it more personable. Stick them into floral foam in the bottom of a floral pot. It is simple, easy, and cute.

The Lollipop tree is reused from Christmas. Patrice replaced the Christmas ornaments with paper hearts (still using the ornament hook) and stuck lollipops through the open holes. This is perfect for Grandma's house, doctor's office, or simply for fun decor. 

The Melted Crayon Art was a Valentine's gift that I made for my husband a few years ago. It absolutely poured on our wedding day and I thought this was the perfect way to recreate those moments. I used a white canvas, traced the picture onto the canvas with a Sharpie, took the wrappers off of blue and gray crayons, and pushed them through a glue gun. It made a huge mess, but it was fun. It about 3 hours total. I do not have step by step photos because I did this way before my blogging days. This hangs in our bedroom and we love it!


Hopefully you found some ideas to spark your creativity. Coming soon will be a post about DIY Valentine Cards!

Have a happy day! Remember to SMILE!

*Hills

Tuesday, December 16, 2014

Do you have time for JOY?


Amidst the hustle and bustle, shopping, wrapping, school plays, and down right STRESS of the Holidays do you remember that this is supposed to be a joyous time of year? Sometimes it's very hard to remember, no matter what Holiday you celebrate. 

I put up the word JOY as a part of our Christmas decor because I though it would be cute, but also as a reminder to be happy amid the stress. 

I found the O at Hobby Lobby (my favorite craft store ever!) on clearance several months ago. I think I think paid 3 or 4 dollars for it. I loved it the second I saw it and knew exactly what I wanted to do with it. I didn't have the other letters yet, but I was working on it. 

I found the Y at Joann Fabrics. I believe I paid around 2-3 dollars for that one as well. It was a brown letter awaiting some creative love... 

(Yes, it's upside down. But I'm okay with that right now.)

All I did was add Washi tape around it. I found festive Washi tape at TJ Maxx recently. When you are close up you can see the overlap, but from far away you just see a cute polka dotted Y. 
 It looked a little plain so I added some thick twine and slipped on a brownish/gold glittery ornament. 


So, I was stuck on the J. I didn't like anything the I could find in stores. I was hoping to buy it because I wanted to take the easy out because I didn't have a ton of time. But I would rather take the time to make one then to be unhappy with what I bought. 

I had some foam board left over from another project and decided to use that. I drew out a J on cardstock for my template. You can print a J off of a word processor if you don't feel like you can free hand it. I traced it onto the poster board three times. Then I took a razor blade and cut each one out. 


I glued the three J's on top of each other to make it thicker. I just used white glue. I then painted the J with red paint. Only only had a dark barn red which was not the look I was going for but I used it anyway. I decided to pour some glitter on it while the paint was still wet. It didn't spread well so I used a lot of glitter. I used course and fine red glitter. The glitter covered up the darker red paint and gave it the look I was going for. Sorry I don't have pictures of this part or the next.

The edges were all raw from the razor blade and it didn't look very nice. I thought about it for a while and then decided to put Washi tape on the edges. In that pack from TJ Maxx came a pretty silvery glitter tape. It was the exact width that I needed. So it worked out perfectly. The tape adhered nicely and I didn't need any extra glue, but it could have been added for added security. 


These are all pretty poor pictures, but there it is. I forgot to take pictures of our set up while in the studio, but I am hoping to get some from the staff. I am still setting my Christmas decor back up in my house since filming. It's been crazy around here. When I get it all set up, I will post more decor pics. 

Until then, I hope that you can find time to enJOY your life throughout the next few weeks. 

Oh, and Hanukkah begins tonight at Sundown. Happy Hanukkah to all those celebrating. I learned a lot about this celebration this year. Hope you all watched Rabbi Weiner on Holiday Fun with Hillary on www.amherstmedia.org!


*Hills


Friday, November 14, 2014

A Memorable Thanksgiving


Thanksgiving is such a warm and wonderful Holiday. Families gather, hearts are grateful, and memories are shared. 

Thanksgiving is the perfect opportunity to incorporate family heirlooms into your decor.
Here are a few examples to get your creative juices flowing.
1. Side table display with heirloom candy dish and recipe box
I did some rearranging at my Mom's house while we were visiting a few weeks ago so I could use them for this post. I picked this particular spot because there are so many memories and heirlooms. The mirror was placed there by my Great Grandfather (by direct order of my Great Grandmother) so the kitchen could easily be seen by anyone sitting in the living room. It has only ever been moved to paint the walls.The table was also an original piece to the house. I simply added a few basic Thanksgiving decorations and included my Great Grandmother's candy dish and her recipe box. Simple, easy, and full of memories.

 2. Recipe box, salt and pepper shakers, and figurines
 Here is another that I displayed the recipe box from my Great Grandmother. Also, not pictured is a recipe from that box that I enlarged on our printer/copier and framed. I love the idea of taking something that is used for a specific purpose and displaying it in the house. I also added heirloom turkey figurines and salt and pepper shakers as accents.

3. Trice's Grandparent's antique goodies
Here is a display that we used in the show. These are from Patrice Wilson's (co-host) Grandparents. For family gatherings Patrice uses these items for serving. The handmade toolbox is great for silverware and the fruit crate is sturdy enough to hold the drink container on top and plates or glasses underneath. It is a beautiful way to display these items. She also uses a sewing box that she inherited from her Grandmother. Trice uses it as a candy dish. I love not using things for the original intended purpose, it makes the display a eye catcher! 

** Don't have family heirlooms? It's okay! Use what you like, so your children and grandchildren will have items to cherish. 
*Even if an heirloom that you have may be simple or less-than-extravagant, use it! Think of a way to use it so you can continue to keep those memories alive. By doing so you are honoring your heritage and those family members will be well represented during your Thanksgiving holiday.

Have fun digging up old treasures!!

*Hills

Monday, October 27, 2014

Halloween Decor ideas

I am a true New Englander. It's kind of hard not to love fall. It has always been my most favorite season. I love mums, pumpkins, squash, leaves etc. Decorating for fall is fun. I have a hard time switching to Halloween though. I have never been real big of Halloween. I am a big scaredy-cat and it has always secretly freaked me out a little. I do LOVE making costumes though. My parents planted that seed when we were real young. Any who, here are a few Halloween decor ideas. 

1. DIY Potion Bottles


Click on the header to view the full tutorial

2.Jailed Pirate Pumpkin
"Goosie" my 7 year old painted this pumpkin at Yankee candle with Santa. When he brought it home he put it into this basket and exclaimed, "Look my pirate pumpkin is in jail!"
I decided to roll with it and make it a part of our decor. Adding children's masterpieces into the decor is positive reinforcement and makes them proud of their work. I have come to love this piece. The basket is going to seem extremely plain once Halloween is over!

4. Family Picture Hack
I have seen pictures on pinterest of naughty elf's on the shelf drawing on family pictures. Heck, our elf even did it! As I was thinking about easy Halloween decor ideas, this on popped into my head. It was quick and simple and the kids love it. Take a dry erase marker and draw away! Make it as fun or as creepy as your heart desires.

4. The witch is in
I love this witch's broom. I have been wanting to write "The witch is in" with a dry erase marker on the window, but it just isn't high on the priority list. Taking that window down is actually a big pain in the rear, and it has already knocked me to the floor once when it fell on my head. If I get up the ambition to take it down and write on it, I will be sure to post it for ya'll!
5. Complete Halloween Displays

Here are two examples of my complete Halloween displays. I always find myself adding to them, which is half of the fun. They always change. The "garland" on the wood sign is actually one of my long necklaces. I added it on there today, and LOVE it!
The Halloween eye chart printable was created by an awesome gal over at Tater Tots and Jello and can be found here.

I hope you have found a little bit of decoration inspiration! 
If you have any questions, please don't hesitate to ask!

Hills


DIY Potion Bottles


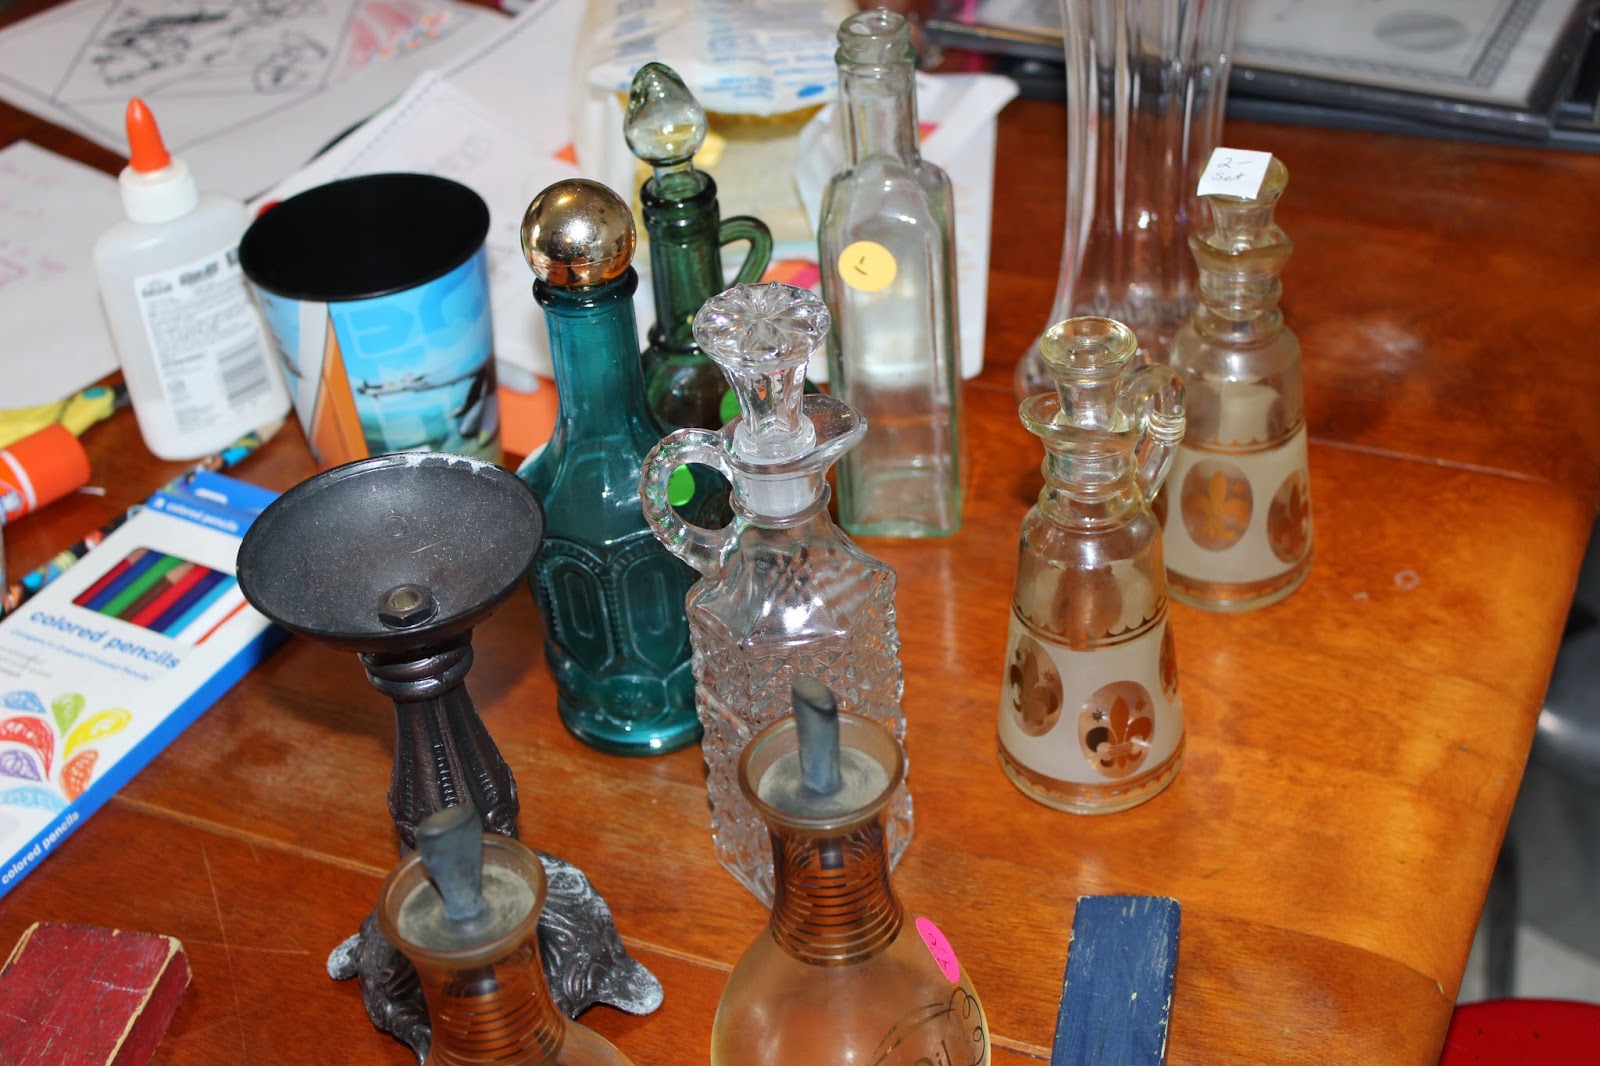
Potion bottles are a fun element to add to your Halloween decor. The cost for this group of bottles was around $4 plus spray paint, which I already had. I went to a small thrift store in our senior citizen center and found these bottles for wicked cheap. I spent .25 cents to $1 per piece.


The first thing I did was take the price tags off and then wipe them down with a wet rag. (Please ignore the first grade project happening on the other side of the table!)


Here are some of the spray paints that I used. I have all different brands. I prefer valspar and rustoleum because they are thicker and rarely drip. 


I applied two to three coats onto each item. It depended upon the style of glass and the brand of paint. 

 This textured glass was a pain in the rear. I sprayed this one about 4 times. I couldn't get into all of the nooks and crannies, so after the white dried, I hit it with a light (speckled) coat of grey. It added a lot of character and hid the blemishes.


I made these labels by using www.picmonkey.com. I still need to upload a program for downloadable printables, but for now you can just right click on the photo and save the image to your computer. When I printed them out they came out grey. I have a feeling that it is a problem with my printer, so hopefully yours will come out the true color! 


I loved making these potions. They were fun! If you make your own, I would love to see your creations. Leave me a comment with your photo!

Here are some pictures of my sister's witch/wizard decor.


Happy Brewing!!
   
Hills