Showing posts with label Halloween. Show all posts

Tuesday, October 28, 2014

Halloween Treats!

I was called out by my 7 year old for being a hypocrite recently. His comment went something like this, "Mom, why do you tell us not to play with our food, but it's okay for you to do it!?" My comment back was, "I don't play with our food, I am creative with it!"
 I quickly realized that I needed to further explain the expression, "Don't play with your food." 

Being creative with food is a ton of fun whether you are entertaining children or not. Here are a few fun ideas of how to incorporate Halloween into your meals and snacks.

1. Jack-o-lantern ham and egg white ghosts

A few mornings ago my 2 year old brought me a slab of ham from the fridge. He pushed the ham into my hands and said, "Ham please!" I decided that I would be creative with breakfast and make a jack-o-lantern out of the ham. I used a knife and cut our the shapes. The boys snacked on the pieces while I fried up the rest. I love the texture that is had after I cooked it. I added celery leaves to the top for the finished product.
For some strange reason I can't get this photo to turn, sorry!

I decided that the ham needed a companion. So next came Mr. Egg White Ghost. I drizzled the egg white into the best ghost shape that I could. I don't think it came out too shabby!

I added two dots of ketchup for the eyes. 

One protein packed Halloween breakfast ready to go!

2. Halloween Pizza
Pizza is a staple in our house. It is so easy to make fun shapes out of. I made a ghost and and jack-o-lantern. I made my dough and then shaped it. I cooked the dough for 10 minutes, then I added sauce, cheese and toppings. 


The Ghost looks a little funny because "Bruiser" doesn't like sauce on his pizza. So, the upper half of the ghost is especially for him.

For the jack-o-lantern I put a thin layer of mozzarella cheese, then a cheddar blend to get the orange look.

3. English Muffin Pizzas

These are a great alternative to making a full pizza. You can have all of the toppings in dishes and have kids decorate their own. All of these are jack-o-lanterns except for the mummy made from onions. These are so simple. It consists of english muffins cut in half, pizza sauce, cheese (I used a thin layer of mozzarella with a cheddar blend on top), and your choice of toppings. Stick them in the over at 350 degrees F for about 15 minutes.  


4. Licorice Tree

This is an easy project. Simply find a vase or tall container and stick your choice of twizzlers or licorice in it. You may need to bawl up some napkins at the bottom to give them some height. You can use it as decor just set it on the table. It adds lots of character and is edible! 
5. Vampire Donuts

These are super simple and fun. I do not have pictures of the ones that I have made, so I am sending you over to a blogger that has had wonderful success with it.

 6. Vampire shortcake

I was thinking about what other foods you could use the vampire teeth with. Here is my attempt to make vampire shortcake. The picture isn't the greatest, but you can get the idea. I cut a hole in the center of the cake and added the teeth. It started to break a part so I actually cut the teeth in half and stuck them in. I thawed frozen strawberries and added sugar. I poured the mix over a small section of the teeth and cake to look like blood. My seven year old thought it was cool and almost devoured it before I could take pictures! 


I know that there are a few things that I missed. I still have pictures that I need to take and edit. I will continue to add food ideas as they are ready. If there is something specific you are looking for please let me know! 

Have fun "playing with your food!"

Hills

Monday, October 27, 2014

DIY Halloween Costumes

I was born into a pretty amazing family. My parents had three daughters. Every Halloween my creative parents went to work making some pretty dang cool costumes. My sisters and I kept this tradition alive. My sisters are are better than I am in this category, but I don't mind. 

Here are a bunch of examples of homemade Halloween costumes. They vary from easy and basic to extremely time consuming, but all are worth looking at!


1. Zebra
 Here is yours truly at almost 2 years old as a zebra with a hot pink mane!


2. A WORKING watering can
My parents made this watering can out of an aluminum trash can. There was a bulb that my sister could squeeze that actually made water come out. I believe she may have one a prize for this one.

3.A Christmas Tree and Working Stoplight
This Christmas tree costume is made from a green sweatsuit, tulle, and plastic bulbs. I also had a Christmas angel on my head. 

My sister was a stoplight. This isn't the greatest picture of it. It has a black "wire" on the top that is difficult to see in this picture. There were two switches on the inside, one for the green light and one for the red. This was a wicked fun costume. I wore it one year as well.

4. Chef and Dalmatian
Both of these were pretty simple costumes. The chef was simply an apron, chef hat, bowl and spoon. My mom painted a mustache on my sister's face. You could also pat some flour on to add character.

The dalmatian was made from a white sweatsuit and socks for the ears. We used a sharpie for the spots.

5. Santa
My sister was dressed as Santa when she was a baby. This is a simple costume for little ones. I love pulling from other Holidays, no one expects it.

6. Farmer
This was not my proudest moment. I did not wanted to dress up but was asked to for a church event. My hair was very long and worked well for the farmer costume. I was so embarrassed. Oh well. Braids, overalls, a hat, and an apple made this costume a success!

***I am missing a lot of photos from our childhood. I am hoping to get my hands on some soon. When I do, I will update this post. I know that a snow cone, world globe, the old lady in the shoe, a bumblebee, bunny, an airplane, an acorn, and the jack-in-the-box are other costumes that my parents created.***

7. Present
I needed a costume for my then 10 month old and had no clue what to do. My mom and I came up with this one with only a few minutes to spare. I cut the bottom off of a gift bag and stuck him in. You can see that he had fun snacking on the tissue paper. We got a lot of comments on how cute he looked! I added TO: and FROM: on his cheeks with face paint. 

                                     8. Cowboy                                   

 9. Steam Whistle
Our third boy is a SCREAMER. Ear piercing screamer! The Bishop of our ward at church (e.i. congregation) nicknamed him "whistle". I thought it was only fitting to make him a steam whistle for Halloween last year. It was all out of felt. I did sew a zipper in the back but you could use velcro. What I love about felt is that you don't need to sew it. I used a fabric stiffener on the hat to help keep it's form. I added an elastic so it would stay on. It was a huge hit especially for those that have been in ear shot of that boy! :)

10. Green Ninja
This was my first time making clothing. It didn't come out too shabby. It was pretty fun to make too. This is the only picture that I have of him without a sling and ace bandage. He broke his collar bone a week before Halloween last year and was all bandaged up. You couldn't even see his shirt. Everyone thought it was part of his costume and that he was a wounded ninja! 

11. Jack Frost
This was so simple and so fun. Well, clothing wise at least. The blue top came from Old Navy and the pants from JCPenney. The hair and make up sealed the deal though. I used white and sparkle hair paint and did my cosmetology magic on his face. At a Halloween party last year, some adults didn't even recognize him. The staff was made from dowels, paper mache with paper bags, and paint. That took several hours to make. I hated that staff by the time I was done! 


12. Where's Waldo
My sister made these awesome Where's Waldo costumes for her family. They won second place at a children's museum for their creativity!!

13. Mario Brothers


14. UP

My Sister made these amazing costumes. She is very particular to detail and is so creative. I wish I could say there is a step by step tutorial, but sadly there is not!

15. The Aqua Bats
The same sister also made these fun costumes. She can do some pretty amazing things! 


16. Star Wars
Here are the costumes she made for her boys this year. Yoda and Luke Skywalker. I believe she is making costumes for her and her husband too. If she does, I will update this with the new pics.


17. Vintage Gum
This is my other sister and her family. She claims that she is not creative. What do you think!? Does this look like an uncreative gal? I don't think so. She made these from cardboard. Each was made a little differently, some with paint, some paper, and some with sharpies. They won second place this year at a Halloween party! Go Tiff!!

Hope you enjoyed this Halloween costume line-up. I will be posting some easy step by step costumes tomorrow!

Happy Costuming!!

Hills

Halloween Decor ideas

I am a true New Englander. It's kind of hard not to love fall. It has always been my most favorite season. I love mums, pumpkins, squash, leaves etc. Decorating for fall is fun. I have a hard time switching to Halloween though. I have never been real big of Halloween. I am a big scaredy-cat and it has always secretly freaked me out a little. I do LOVE making costumes though. My parents planted that seed when we were real young. Any who, here are a few Halloween decor ideas. 

1. DIY Potion Bottles


Click on the header to view the full tutorial

2.Jailed Pirate Pumpkin
"Goosie" my 7 year old painted this pumpkin at Yankee candle with Santa. When he brought it home he put it into this basket and exclaimed, "Look my pirate pumpkin is in jail!"
I decided to roll with it and make it a part of our decor. Adding children's masterpieces into the decor is positive reinforcement and makes them proud of their work. I have come to love this piece. The basket is going to seem extremely plain once Halloween is over!

4. Family Picture Hack
I have seen pictures on pinterest of naughty elf's on the shelf drawing on family pictures. Heck, our elf even did it! As I was thinking about easy Halloween decor ideas, this on popped into my head. It was quick and simple and the kids love it. Take a dry erase marker and draw away! Make it as fun or as creepy as your heart desires.

4. The witch is in
I love this witch's broom. I have been wanting to write "The witch is in" with a dry erase marker on the window, but it just isn't high on the priority list. Taking that window down is actually a big pain in the rear, and it has already knocked me to the floor once when it fell on my head. If I get up the ambition to take it down and write on it, I will be sure to post it for ya'll!
5. Complete Halloween Displays

Here are two examples of my complete Halloween displays. I always find myself adding to them, which is half of the fun. They always change. The "garland" on the wood sign is actually one of my long necklaces. I added it on there today, and LOVE it!
The Halloween eye chart printable was created by an awesome gal over at Tater Tots and Jello and can be found here.

I hope you have found a little bit of decoration inspiration! 
If you have any questions, please don't hesitate to ask!

Hills


DIY Potion Bottles


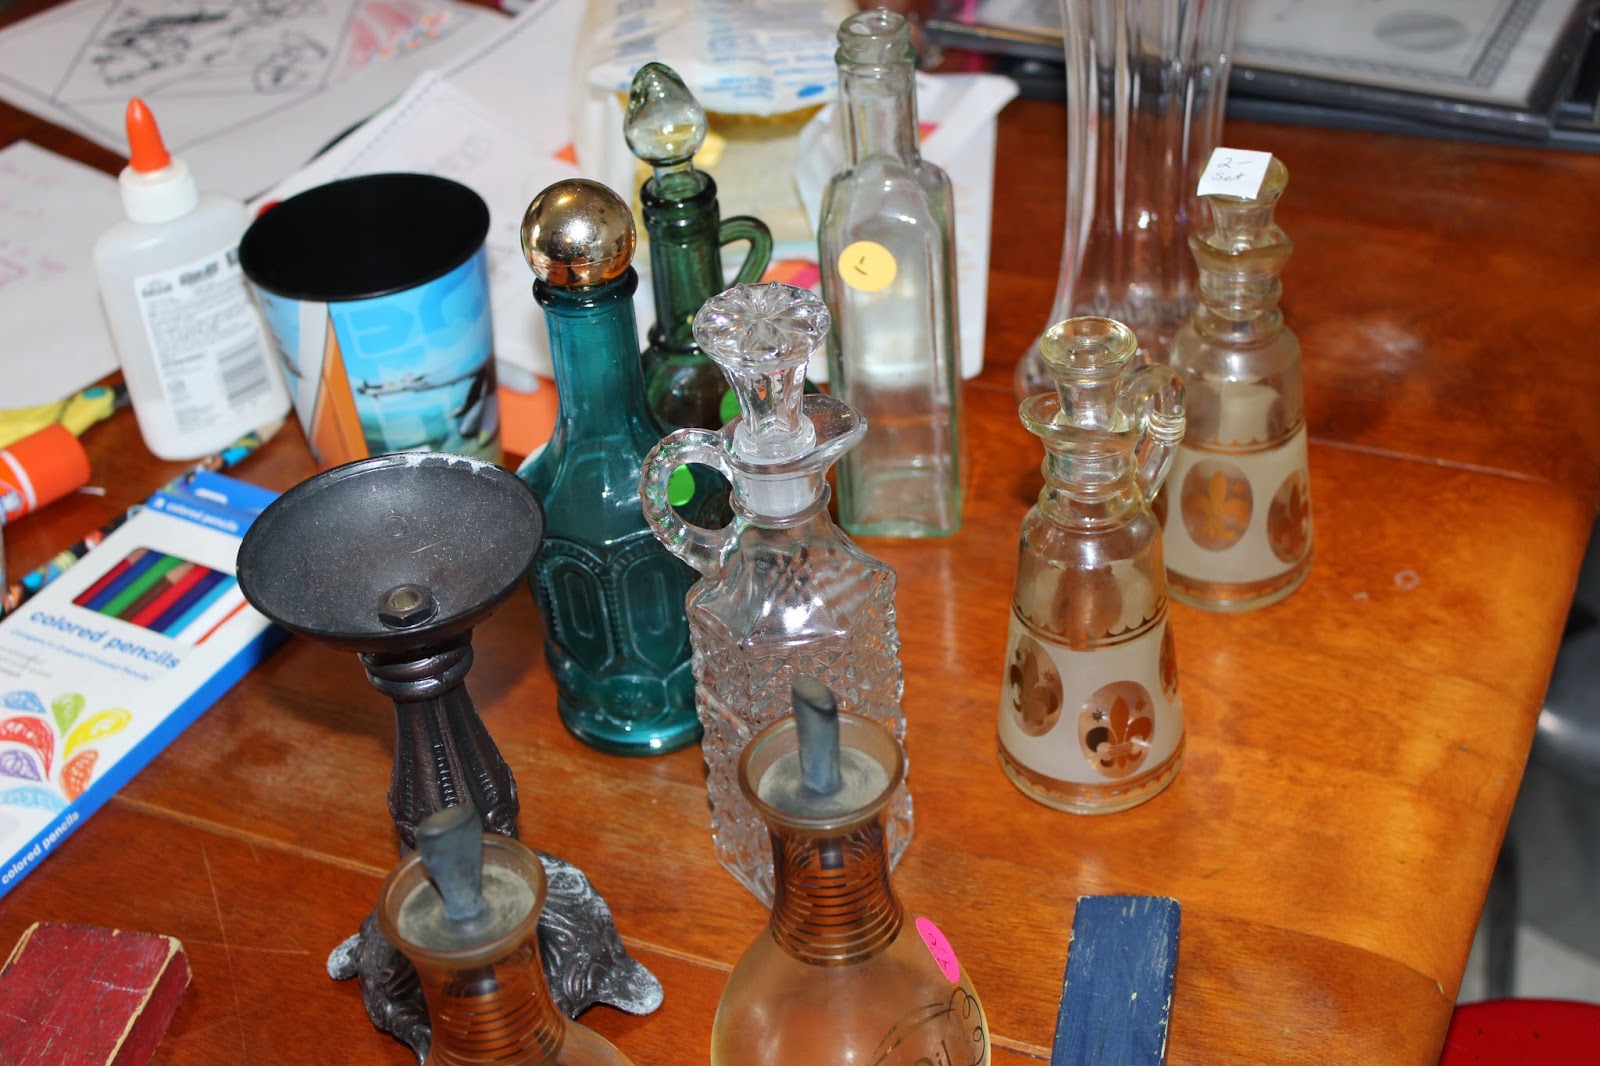
Potion bottles are a fun element to add to your Halloween decor. The cost for this group of bottles was around $4 plus spray paint, which I already had. I went to a small thrift store in our senior citizen center and found these bottles for wicked cheap. I spent .25 cents to $1 per piece.


The first thing I did was take the price tags off and then wipe them down with a wet rag. (Please ignore the first grade project happening on the other side of the table!)


Here are some of the spray paints that I used. I have all different brands. I prefer valspar and rustoleum because they are thicker and rarely drip. 


I applied two to three coats onto each item. It depended upon the style of glass and the brand of paint. 

 This textured glass was a pain in the rear. I sprayed this one about 4 times. I couldn't get into all of the nooks and crannies, so after the white dried, I hit it with a light (speckled) coat of grey. It added a lot of character and hid the blemishes.


I made these labels by using www.picmonkey.com. I still need to upload a program for downloadable printables, but for now you can just right click on the photo and save the image to your computer. When I printed them out they came out grey. I have a feeling that it is a problem with my printer, so hopefully yours will come out the true color! 


I loved making these potions. They were fun! If you make your own, I would love to see your creations. Leave me a comment with your photo!

Here are some pictures of my sister's witch/wizard decor.


Happy Brewing!!
   
Hills